Step 1: Setting up senseBox-Config-AP
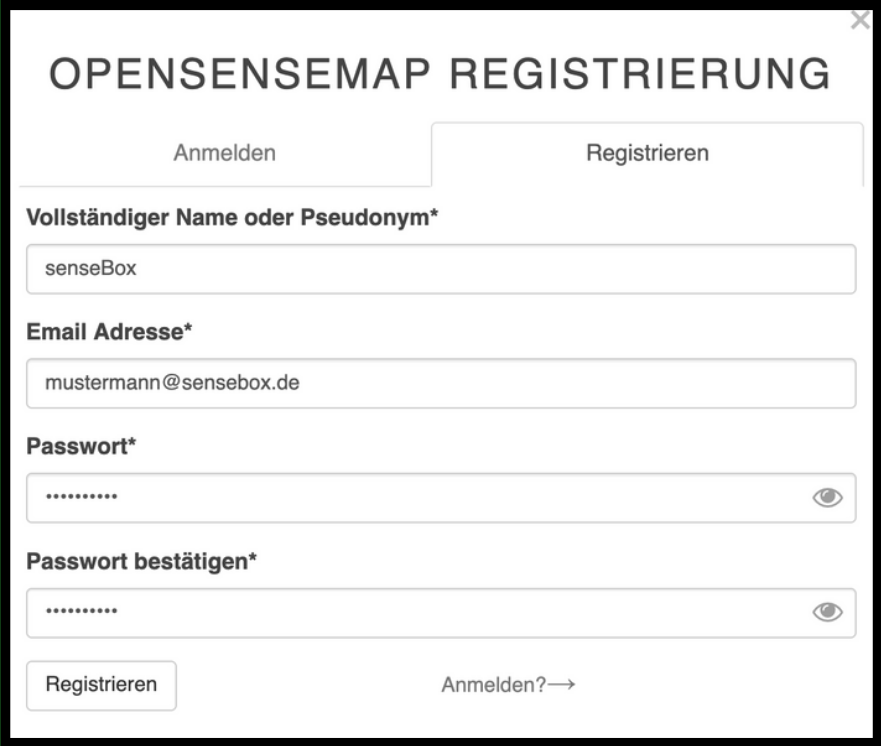
1. Create an openSenseMap account
- Open https://opensensemap.org.
- Click "Login / Register" in the top right corner.
- Select "Register" and create your own account.
- Confirm your email.
2. Create a senseBox
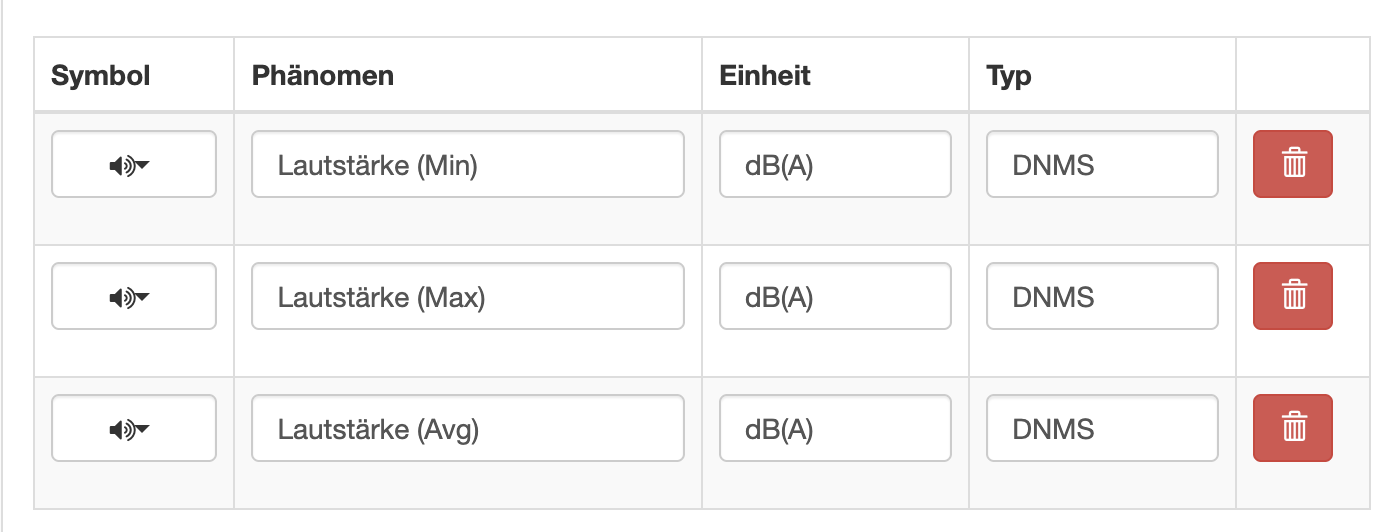
- Log in with your account and click "Create new senseBox".
- Enter a name and a deployment location.
- Set the group tag to "Cindy-S".
- Select "Manual configuration" and add 3 phenomena listed on the left side.
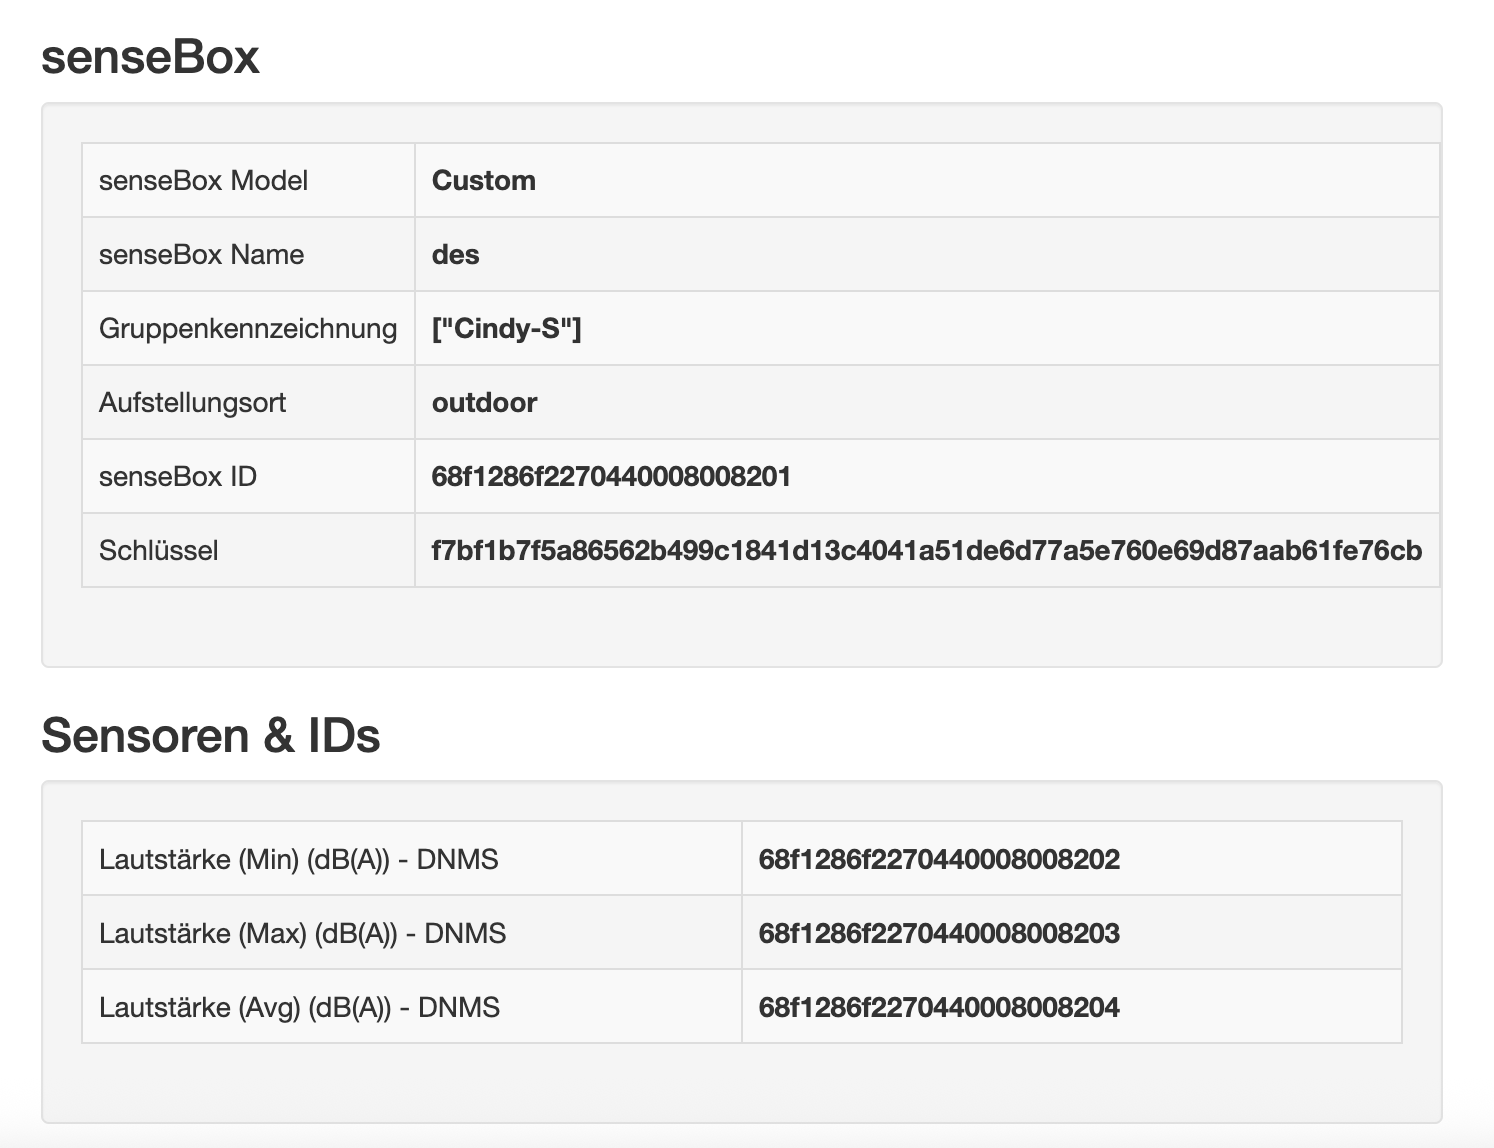
3. Finalize and save the IDs
- Click "Create senseBox".
- The overview screen will now show all important information about your senseBox.
4. Power on the senseBox
- Connect the senseBox to power via a USB cable.
- Wait a few seconds until the senseBox has fully started.
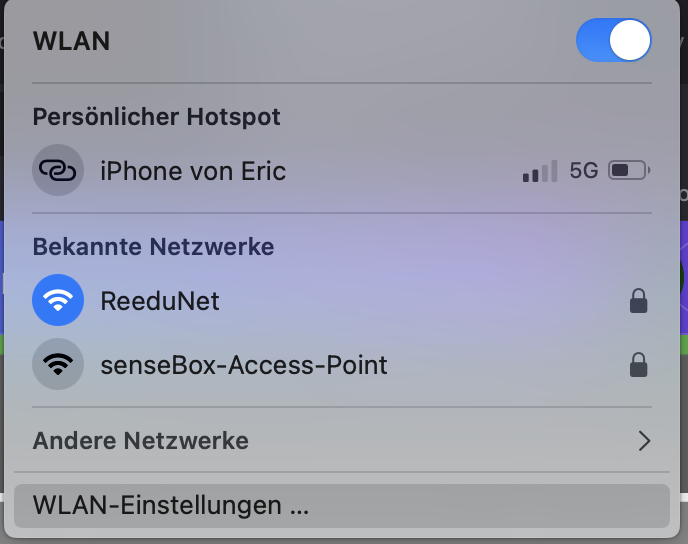
- The senseBox has now created an access point (WiFi hotspot).
- Connect to this access point.
- The password is 12345678.
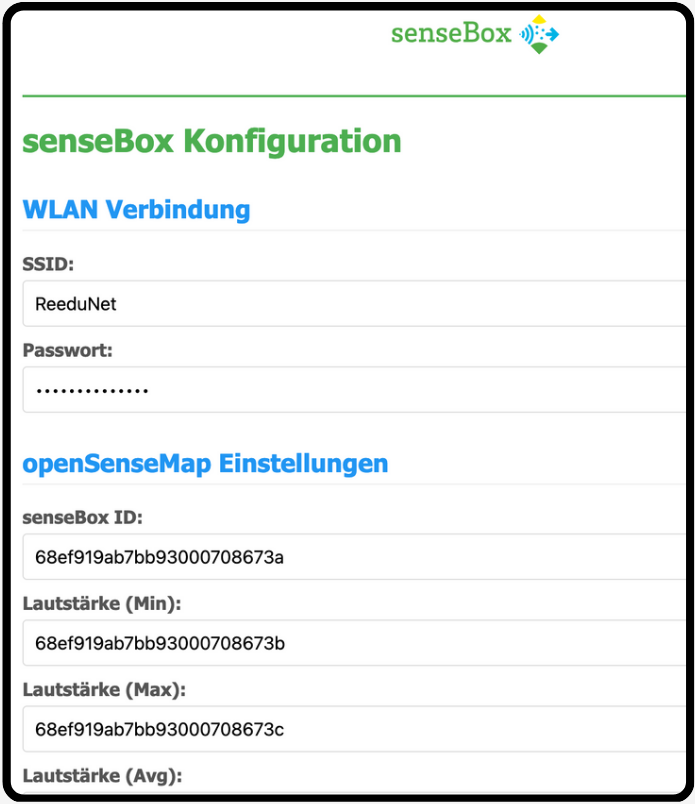
5. Open the configuration page
- Scan the QR code or open http://192.168.4.1 in your browser.

6. Enter WiFi information and IDs
- Enter the network name (SSID) and password of your home WiFi.
- In the openSenseMap settings, enter the IDs from openSenseMap.
- MAKE SURE TO USE THE CORRECT ORDER OF THE IDS!!!
- Click Save & Restart.
After restarting, the senseBox will automatically connect to the WiFi. For status or changes, connect again to the access point.